Artificial grass or astroturf elevates the beauty of your lawn and the green colour gives a pleasant look to your eyes which is important for your mental health. However, as much as it is important, installing artificial grass can be hard and you may find yourself scratching your head thinking, ‘This didn’t look hard but it is sure turning out to be. I wonder how can I do it by myself?’
If you’re also in a similar condition then let us tell you that although installing astroturf often requires professional help, we can actually help you do the task yourself through this guide. Let’s begin!
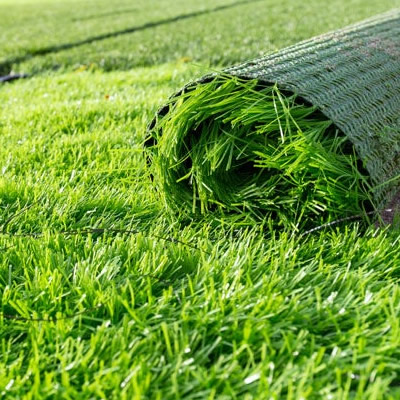
Required Tools for Laying Artificial Grass
First, you need to know about the tools required to install the artificial grass by yourself:
- Gloves
- Shovel
- Hammer
- Turf cutter
- Joining tape
- Stanley knife
- Tape measure
- Joining adhesive
- Broom/stiff brush
- Planks for compacting
- Ground pins/galvanised nails
Set-by-Step Process of Installing Artificial Grass
Here is how to carry out a proper astroturf installation:
- Plan Out the Area: Before start installing the grass, plan out the area to be covered. You need to ensure that water pipes and cables are about 2 inches beneath the excavating depth. If not, you can do it with a spade or turf cutter. Eliminate any bricks, large stones, or other hitches.
- Remove Grass: Remove the upmost four inches of your current lawn and base, and then discard it as per the local guidelines. Soil quickly builds up, so it is better to have a landfill trailer on the spot.
- Install Weed Barrier: Install a weed barrier to prevent weed growth that can penetrate the base of the artificial turf grass. The weed barrier has the ability of keeping weeds down while providing drainage due to its porosity. Set up the weed barrier across the aggregate base followed by cutting as required while ensuring that the right surface faces up. Overlap each length of fabric and around the edges, and 6-inch alvanized nails or landscape anchors every few feet for securing it in place. Installing a weed barrier is not necessary if you have pets.
- Add Base: Now when the weed barrier is installed, you need to spread 3inches of class two road base evenly over this same area. The road base will be helpful for creating an even stage with efficient drainage. Damp the area a little bit and go over it with a compactor to level the base before you lay the material.
- Lay New Turf: Now you need to lay the new turf but be cautious about not dragging it across the base which you have just prepared. It is best to let your grass sit in the sun for 30-60 minutes to open out. Make sure that the blades and stitch patterns face the same way; otherwise, the final outlook of your lawn can look pretty messed up. Move the turf into place by using a carpet kicker.
- Cut the Lawn to Size: Now that you have laid the turf, you need to fit your new lawn to the shape of your yard using a box cutter. For finishing touches, leave a quarter to half an inch of turf over the border. Then secure the joints using seam glue or tape. While stitching, make sure that the blades of all the pieces of artificial grass are angled in a similar manner and that there is a ynchronization of space present among the stitch rows. Position the seam tape’s red line in the seam’s center forming an “S” pattern with the glue on either side of the red line Then place the turf at its position, allowing the adhesive to set in.
- Secure Turf: Secure your turf to its three-inch base after tucking in the border by placing 40-D 5-inch non-galvanised turf nails every six inches. It is better to place a few nails along the seams to underpin these areas. Start brushing the turf by tilizing power or pushing the broom to stand the blades up straighter before you add the infill. This will help create a more vertical position of blades.
- Spread Infill: Now, you have to work for spreading the infill. Remember to use a drop spreader to equally disperse the proper quantity of infill as it can directly influence the outlook, performance, and longevity of your lawn.
- Brush Infill: Once the infill is set in place, again brush the turf using a push or power broom as it will make the blades stand up straight and give your lawn a fresh outlook. Lastly, clean the grass to get rid of all the remaining dust.
- You’re Done! Have a Blast! Once you’ve completely cleaned your lawn and packed up your gear, there is only one thing left; to sit back and chill. Enjoy the lawn with the brand-new turf you just installed yourself, feeling victorious.
Benefits of Installing Artificial Grass
You can’t imagine the benefits you acquire with artificial grass. Let’s give you a brief outlook:
- Artificial grass is safe for children and pets.
- Astroturf doesn’t need fertiliser or pesticides.
- Artificial turf grass helps decrease water consumption.
- It cuts down the air pollution caused by the lawn mowers.
- With astroturf, you don’t need to worry about murky puddles.
- It’s a perfect choice for regular grass in communities with water limitations.
- You don’t have to invest in the materials and labour typically spent on lawns without astroturf.
- Artificial grass is a cost-effective option for owners and it comes with minimal maintenance requirements.
- Due to low maintenance, you can enjoy more time with your loved ones and do the things you’d rather be doing besides caring for your lawn.
Maintaining Artificial Grass
Everything you own of value requires proper care and maintenance. That includes the artificial grass as well. Even though it doesn't grow like your old lawn, it still requires maintenance. Let’s discuss how to plan your maintenance routine:
- Quickly clean up the spills as soon as you identify them.
- When the pet makes a mess, allow it to dry, then scoop it up and discard it.
- Always wash the area with clean, cold water to eliminate any soap traces. Rinse the whole area to remove residues.
- Cross-brushing against the grain from time to time helps plump up the fibers and keep the artificial grass looking perfect.
- Regularly brush the artificial turf grass to prevent matting, particularly in high-traffic zones, ensuring the fibres stay erect.
- Eliminate the urine smell by spraying the area with baking soda to neutralise the odour and allow it to sit for 20 minutes, then clean properly with warm water.
- Use a cleaning solution made from one teaspoon of mild domestic detergent and one pint of warm water to clean stains like mustard, alcohol, blood, urine, fruit juice, tea, ketchup, ice cream, etc., from the grass.
- Avoid using any highly acidic cleaning products containing bleach. Always follow the manufacturer's label instructions for usage when using commercial cleaning products, particularly those designed for artificial grass.
Seek Us Out for Artificial Grass Installation!
Although, this guide helps you dearly, installing astroturf yourself. However, we at A and M Groundworks understand that it might still get difficult for commoners, especially those doing it for the first time, to get stuck during the process. But there is nothing to worry about as we’re here to do the astroturf installation job for you. We send professionals to do this job and also offer several other landscaping services like driveways, fencing, brickworks, curb installation, etc. Our 15 years of experience and 5 stars across the board is a testimony to our quality services. So don’t wait and call 01392984088 or ajmulligan@mail.com for queries or reservations.